 English
 русский
 Español
Content
- 1 Understanding thin line staples and where they shine
- 2 How to choose the right thin line staple for your work
- 3 Practical techniques for working with thin line staples
- 4 Removal, maintenance and safety
- 5 Direct comparison — thin line staples vs narrow crown staples
- 6 Size & gauge reference charts and quick selection table
- 7
- 8 Project ideas, best practices and advanced tips
- 9 Final notes and recommended workflows
Understanding thin line staples and where they shine
Definition and core characteristics
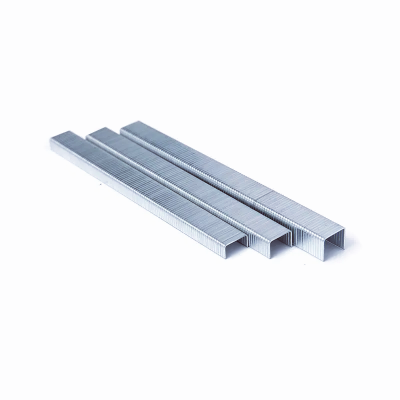
Thin line staples are a specialized category of fastening elements characterized by a narrower crown width and finer wire gauge than standard heavy-duty staples. The term "thin line" in this context refers primarily to the reduced crown profile and the thinner wire diameter; those traits together allow thin line staples to be used where a less visible, less intrusive fastening is required. Unlike bulkier staples, which are designed for sheer holding strength on thick or very robust materials, thin line staples are engineered for precision, discreet fastening and minimal intrusion into the substrate. They are manufactured in a range of wire gauges commonly referenced as "fine wire" (higher gauge numbers represent thinner wire), and their crown widths and leg lengths are often standardized in series specific to fine-wire and narrow crown families. The reduced profile of thin line staples translates to several practical advantages: they leave smaller holes, reduce the risk of splitting thin veneers or delicate fabrics, and enable a cleaner aesthetic because less metal is visible on the surface after installation. These properties make thin line staples particularly suitable for finish carpentry, decorative trim, delicate upholstery tasks, archival paper work, and crafts where appearance and minimal material disturbance are priorities.
Common applications and why they fit those uses
Thin line staples are commonly found in a number of specialist uses that value subtlety and control over brute force. For instance, in upholstery and furniture trim, the thin crown and fine wire reduce the chance of puckering fabric and avoid obvious staple heads showing through light or thin materials; for this reason thin line staples are the go-to solution for jobs that call for neat edges and a high-quality finish. In craft and packaging scenarios where thin cardboard, paperboard or decorative layers are being joined, thin line staples create a secure connection without tearing or leaving a large visible metal crown. In woodworking tasks such as attaching thin molding or veneer, thin line staples minimize splitting, reduce tearout and produce fewer visible blemishes in the finished surface. The same logic applies to archival or paper-based projects where small, unobtrusive fasteners are needed to hold samples, swatches, or multi-page assemblies without damaging fibers. Because of the consistent demand for this kind of discreet fastening across multiple niches, the search interest for needle-like, fine-gauge fastening content typically clusters around specific needs — for example, guides for upholstery, removal techniques to prevent damage, size and gauge references, and direct comparisons against narrow crown staples. Those topic clusters form the backbone of practical, low-competition search queries that serve makers, professional upholsterers, conservators and hobbyists alike.
How to choose the right thin line staple for your work
Gauge, crown width and leg length explained
Selecting the correct thin line staple is best understood as matching three interdependent dimensions to your project: wire gauge, crown width, and leg length. Wire gauge determines the thickness of the staple's legs and therefore its shear strength and how easily it penetrates materials; a higher gauge number indicates a thinner, finer wire and therefore less visual bulk and reduced risk of splitting delicate materials. Crown width — the horizontal distance between the two legs — controls how much surface area the staple covers: a narrower crown is less visible and sits more flush, while a wider crown distributes holding force over a larger area but is more conspicuous. Leg length controls penetration depth and must be chosen so that the legs fully engage the substrate and clinch properly without protruding or causing blow-through. When combined correctly, these three variables produce a staple that holds reliably while minimizing damage and visual impact.
For example, a thin line staple with a fine wire gauge, a narrow crown and short leg length is ideal for attaching thin fabric to a wooden frame where minimal surface visibility is essential. Conversely, if you need to fasten thin fabric over a layer of foam to a wooden base where the staples must travel through both fabric and foam, you would choose a slightly longer leg length while keeping the wire gauge fine enough not to create large holes in the fabric. The interplay here is subtle: using a thicker wire will increase strength but also increase the hole size and the chance of fabric stress; using a crown that is too narrow for the load can cause premature pull-through. Practical selection therefore starts by listing the layers you will penetrate, measuring combined thickness, deciding how discreet the fastener must be, and finally choosing a leg length and crown width that fit both your stapler tool and the load requirements.
Material, finish and environment considerations
Material choice for thin line staples is not just about strength; it also affects corrosion performance, long-term appearance and interaction with the substrate. Stainless steel and galvanized finishes are often used when moisture or outdoor exposure is a concern, because untreated steel can rust and cause staining on fabrics or wood. For indoor applications where appearance dominates and corrosion is not a concern, plain steel fine-wire staples may be acceptable. Another factor is the coating type: some staples have clear protective coatings or are electro-plated to resist fingerprints, tarnishing and mild oxidation. Environmental considerations should influence the selection: outdoor cushions or marine upholstery will require corrosion-resistant staples, whereas interior decorative trim can benefit from the smallest crown and finest gauge your stapler can handle. Finally, always check tool compatibility: some staplers accept only specific crown widths or collated types; using a staple with an incompatible crown or feed pattern can jam the tool or lead to inconsistent driving depth. Match the staple dimensions to both the project requirements and the stapler's specifications.
Tool compatibility and stapler types
Tools matter — pneumatic staple guns, manual tackers and electric staplers differ in driving power and in the range of staple types they accept. Fine wire thin line staples are frequently used with tacking tools designed for narrow crowns and fine-wire collated strips. When choosing a tool, confirm the crown width and wire gauge tolerance, along with the maximum leg length. Lighter manual tools can handle fine-gauge staples for shallow applications, while pneumatic tools provide consistent force for driving longer legs through layered materials. The relationship between tool and staple is critical: a mismatch may lead to incomplete clinch, deformed crowns, or damaged fabric. For sensitive materials, prefer controlled, incremental stapling using a tool with adjustable pressure and a precise nosepiece that allows you to seat the crown without crushing the material. Finally, when in doubt, test drive a few staples on scrap material to fine-tune power and verify the correct clinch.
Practical techniques for working with thin line staples
Stapling methods for upholstery and delicate textiles
Using thin line staples for upholstery demands a precise approach. Start by preparing and tensioning the fabric: ensure the fabric is smooth and held taut over the frame or foam, but not overstretched to the point of distortion. Position the staple so that the crown sits parallel to the edge you are anchoring; take care that the legs will enter the wood or base at a clean, perpendicular angle to obtain a solid clinch. For delicate fabrics, use backing or interfacing when possible: place a thin strip of strong, non-abrasive backing behind the fabric to distribute stress and reduce the chance of the fabric tearing when staples are seated. Another tip is to pre-staple with a lower force setting (if your stapler allows adjustment) and then increase force for final staples; this prevents sudden high-impact drives that could tear fragile materials. Spacing is also important: for a neat, secure finish, staples are often placed at 1–2 inch intervals along edges and 3–4 inches across larger flat areas, but adjust this pattern depending on fabric weight and expected strain. When you anchor corners, fold fabric cleanly and use multiple small tacks or thin-line staples spaced closely—this approach avoids placing large, exposed fasteners that can distort the corner.
Setup, spacing and finishing tips
Effective setup includes marking your staple locations and using a helper clamp or a series of temporary tacks to hold the fabric while you work. A recommended workflow:
- Lay out the fabric and mark intended staple lines with chalk or a removable marker.
- Use clamps or temporary small tacks at corners to preserve tension while you begin.
- Start stapling from the center of one side and move toward each end to keep tension even.
- Check for alignment frequently and use a mallet or block to seat staples if they are not driven flush.
For finishing edges, fold the fabric under to hide raw edges and place staples on the underside where they will not be visible. If a staple is slightly proud (not fully flush), gently tap it with a small punch and a mallet to set it. For visible seams where aesthetics are crucial, consider using a narrow crown thin line staple and then cover the staple line with matching trim or piping to hide the crowns.
Common mistakes and troubleshooting
The most frequent issues with thin line staples are tear-through, inconsistent clinch, and jams. Tear-through usually indicates a staple that is too thick for the fabric, too few staples for the load, or insufficient backing. Inconsistent clinch suggests the leg length is incorrect or the stapler pressure is insufficient; check the tool and staple compatibility and test on scrap materials. Jams can often be traced to dirty feed channels, incorrect collated strips, or staple dimensions that exceed the tool's specification. Troubleshooting steps:
- Verify that the staple gauge and crown match the tool's spec.
- Clean the stapler's feed channel and nosepiece regularly.
- Test on scraps to isolate whether the problem is the tool, the staple or the material.
- If tear-through occurs, switch to a finer gauge, add a backing strip, or increase staple spacing and number to distribute load.
Patience and incremental testing are essential: a few test staples on scrap fabric will save time and avoid costly mistakes on the actual piece.
Removal, maintenance and safety
Tools and step-by-step removal procedures
Knowing how to remove thin line staples safely is as important as knowing how to install them, because careless removal can ruin fabric, tear paper, or splinter wood. The general toolkit for safe removal includes a thin-bladed staple remover or tack lifter, needle-nose pliers, a flat-head micro-screwdriver for prying where necessary, and protective gloves to avoid cuts. Removal procedure (detailed steps):
- Identify the crown and access point: ensure you are pulling perpendicular to the crown to avoid bending fabric.
- If the crown is accessible, slide the thin blade of the remover under the crown and gently rock to lift. For staples deeply embedded in wood, use a narrow pry under the crown and protect the surface with a thin shim (cardboard or plastic) to prevent chipping.
- Once the crown is lifted enough to expose the legs, use needle-nose pliers to grasp each leg and pull slowly, keeping the pull angle as straight as possible to minimize tearing.
- For fragile fabrics, lift around the staple area with a small piece of stabilizer or tape to support fibers as you extract the staple.
- Inspect the site for residual holes or bent ends and, if necessary, patch or press the substrate to restore appearance.
Use of the right tool avoids enlarging the hole or tearing the material. Where a staple is partially buried, a small punch can help raise the crown slightly before pliers extraction. If the staple is in a visible area that must remain pristine, consider removing surrounding staples first and then work inward so tension is released gradually and material can be smoothed out as staples are removed.
Minimizing damage to fabric, wood or paper
Minimizing damage during removal relies on support and control. For fabrics, apply temporary stabilizers (such as fusible web on a low setting for non-sensitive textiles, or a wide strip of painter's tape on the underside) to hold fibers together near the staple as you remove it. For paper and archival work, always use specialized micro-staple removers and work under magnification for precision; avoid pulling perpendicularly without first lifting the crown and gently easing the legs out. For wood, use a thin shim under the removal tool to avoid chipping and, after removal, use a wood filler appropriate to the grain and finish to blend the site. In all cases, remove staples slowly and deliberately rather than yanking them out; quick, forceful pulls are the main cause of ripped fabric, torn paper or splintering wood.
When to replace staples vs reuse
Thin line staples are inexpensive, but reuse is sometimes possible for small craft projects where appearance is not a concern. However, staples that have been bent, fatigued or compressed should not be reused because they will not clinch properly and can cause failure. If a staple has been partially opened during removal, or its legs are distorted, replace with a fresh staple of the same gauge and crown to ensure secure clinch. For professional upholstery and load-bearing finishes, replace rather than reuse to guarantee long-term reliability.
Direct comparison — thin line staples vs narrow crown staples
Sentence comparison
Thin line staples and narrow crown staples overlap conceptually — both aim to minimize visibility — but they are not always identical categories. Thin line staples emphasize a finer wire gauge and subtle profile; narrow crown staples emphasize crown width specifically and can be found across different wire gauges. In practice, a thin line staple is often a narrow crown staple manufactured with a finer wire; however, a narrow crown staple might be heavier in wire gauge for higher strength while still keeping the crown narrow. The choice between them depends on whether your priority is invisibility and minimal substrate disturbance (favor thin wire, higher gauge) or whether you need a narrow footprint but greater shear strength (favor a lower gauge narrow crown staple). Below is a compact table that summarizes this contrast in pragmatic terms.
Comparison table
The following table displays the major practical differences and suggested applications. First the sentences above explain the differences; now the tabular form gives a quick lookup for decision-making.
| Attribute | Thin Line Staples | Narrow Crown Staples | Best Use |
|---|---|---|---|
| Typical wire gauge | Fine (higher gauge: e.g., 20–23 gauge) | Varies (can be fine or heavier: e.g., 18–20 gauge) | Thin line: delicate fabrics; Narrow crown: narrow footprint, variable strength |
| Crown width | Very narrow (designed to be subtle) | Narrow but available in multiple widths | Thin line for invisible finish; narrow crown for constrained area |
| Holding strength | Moderate — prioritizes subtlety | Can be higher if wire is thicker | Thin line for finish; narrow crown for join where strength matters |
| Risk of substrate damage | Lower (less splitting in thin veneers/fabrics) | Variable (depends on gauge) | Thin line reduces damage risk |
| Typical tools | Fine-wire tackers, specific narrow-nose staplers | Wide range including pneumatic narrow crown staplers | Match tool to staple spec |
Size & gauge reference charts and quick selection table
Typical gauges and practical meaning
A practical size and gauge guide helps you choose the correct thin line staple for a specific project. Wire gauge numbers work inversely (higher number = thinner wire). Typical ranges and what they mean:
- 22–23 gauge: very fine wire suitable for lightweight fabrics, thin veneers and delicate paper/archival work where minimal hole size is crucial.
- 20–21 gauge: fine wire commonly used in upholstery for light to medium fabrics; good compromise between holding power and subtlety.
- 18–19 gauge: heavier end of narrow crown family — better for moderate loads where a narrow footprint is required but more strength is necessary.
Leg length should be chosen to exceed combined material thickness by approximately 2–3 mm to ensure a secure clinch without protrusion. Crown width should be the narrowest that still evenly distributes the stress for your application.
Quick lookup table for common projects
Use this table as a one-page decision aid to choose a staple for common thin-line use cases. It is intended as a practical shortcut rather than a strict engineering spec.
| Project | Suggested gauge | Suggested crown | Suggested leg length |
|---|---|---|---|
| Decorative trim / thin molding | 22–23 gauge | Very narrow | 1/4"–3/8" (6–10 mm) |
| Light upholstery & cushions | 20–22 gauge | Narrow | 3/8"–1/2" (10–13 mm) |
| Paper craft / archival mounts | 22–23 gauge | Very narrow | Short leg to just secure layers |
| Thin veneer or paneling | 20–21 gauge | Narrow | 3/8"–1/2" (10–13 mm) |
Project ideas, best practices and advanced tips
Small projects using thin line staples
The subtlety of thin line staples unlocks many small projects where appearance and minimal substrate impact matter. Examples include:
- Edge finishing of decorative cushions where staple heads must not show through thin fabric.
- Attaching delicate piping or welt to ornamental furniture frames with minimal visible metal.
- Securing thin veneer or trim to sample boards without splitting or marking the wood.
- Binding small swatch books or sample sets where a small, unobtrusive fastener is required.
- Craft projects where multiple thin layers of paper or fabric need to be joined cleanly.
In each example, the same workflow applies: choose a fine gauge, test on scrap material, protect the visible face, and use close spacing or backing to distribute load. For upholstery novices, practice simple frames before tackling a full furniture piece; many beginners find that mastering corner folds and tension control is the largest skill barrier.
Long-term care, inspection and repair
Once installed, periodically inspect staple lines for loosening, corrosion or fabric stress. For outdoor or humid environments, prefer corrosion-resistant staples and treat exposed wood or fabric edges with sealant or suitable finishes to prevent moisture ingress. When repairing, remove adjacent staples methodically to relieve tension before sewing or re-stapling; always replace with fresh staples rather than re-use bent fasteners. For visible repairs, consider using matching trim or filler to maintain aesthetics.
Final notes and recommended workflows
In practical terms, adopting thin line staples in your workshop begins with four simple workflows:
- Measure the combined material thickness, then choose a leg length slightly longer than the material stack to ensure clinch.
- Pick the finest gauge that still provides secure holding; when in doubt, start finer and step up gauge only if pull-through or shear becomes an issue.
- Always test on scrap materials that mimic the exact stack you will fasten; test for clinch, visibility and any adverse effect on the face material.
- Document the staple specs and tool settings for repeatability on similar projects so future runs are predictable and consistent.
The five long-tail keyword topics woven through this guide — thin line staples for upholstery projects, how to remove thin line staples safely, thin line staples vs narrow crown staples, thin line staples size and gauge guide, and thin line staples for delicate fabrics — are practical lenses into the decision-making and how-to content that practitioners need. Use this guide as a working reference: keep a small sample board showing the staple types you use most, label their gauge and leg length, and store that board near your stapling tools to speed selection and reduce errors.


