 English
 русский
 Español
Content
Understanding Your Project Requirements
Selecting the correct fastener hardware nails is the cornerstone of any successful DIY project. The process begins long before you open a box of nails; it starts with a thorough assessment of the materials you intend to join and the environmental conditions the finished piece will endure. This foundational step prevents failures, ensures safety, and delivers a professional-looking result. Many DIY enthusiasts make the mistake of reaching for whatever nail is already in their toolbox, but this approach often leads to split wood, corroded fasteners, or joints that loosen over time. The right nail acts as an integral component of the structure, not just a simple connector.
Firstly, consider the primary materials. Are you joining softwood, hardwood, plywood, particle board, drywall, or masonry? Each material has different density, hardness, and holding characteristics. Secondly, evaluate the project's purpose and load-bearing requirements. A decorative picture frame has vastly different demands than a backyard deck or a bookshelf meant to hold heavy volumes. Finally, think about the environment. Will the project be indoors, outdoors, exposed to weather, or in a high-humidity area like a bathroom? Answering these questions narrows down the vast field of nail types to a manageable few that are suitable for your specific application. This initial due diligence is non-negotiable for quality workmanship.
Key Types of Fastener Hardware Nails Explained
The world of fastener hardware nails is diverse, with each type engineered for specific tasks and materials. Understanding the design, strengths, and intended use of each common nail type is crucial for making an informed choice. Using the wrong nail can compromise the integrity of your project, while the right one will provide a strong, durable, and often invisible connection.
Common Nail Varieties and Their Applications
Here, we delve into the most frequently encountered nails in DIY projects, moving beyond a simple list to explain the "why" behind their design.
Common Nails and Box Nails
These are the classic, general-purpose nails most people picture. Common nails have a thick shank and a flat head, designed for strong framing work where holding power is paramount, such as in wall framing or securing joists. Box nails are similar but have a thinner shank, reducing the chance of splitting softer woods like pine or spruce, making them ideal for light framing and crate construction. The key difference lies in shear strength versus splitting tendency.
Finish Nails and Brads
When appearance matters, finish nails and brads are the go-to choices. They have small, barrel-shaped heads that can be driven below the wood surface (countersunk) and hidden with wood filler. Finish nails are heavier gauge and used for attaching trim, molding, and cabinetry. Brads are essentially thinner, smaller-gauge versions, often used in pneumatic nailers for delicate trim work, securing thin plywood backs, or small craft projects where a finish nail would be too conspicuous or likely to split the material.
Masonry Nails
Designed for penetrating hard, brittle materials like concrete, brick, or block, masonry nails are made from hardened steel to resist bending. They typically have a fluted or grooved shank for better grip in the masonry material. It's important to note that for heavy-duty or permanent anchoring into masonry, specialized mechanical anchors or epoxy are often superior. However, for light-duty tasks like attaching a wooden furring strip to a concrete wall, they can be effective. A common query among DIYers working with such materials is best nails for concrete block walls DIY, and while masonry nails are one answer, the choice depends heavily on the expected load.
Specialized Nails for Specific Tasks
Beyond the basics, several specialized nails solve unique problems in the workshop or on the job site.
- Roofing Nails: Characterized by a wide, flat head and a short, thick shank. The large head prevents the roofing material (like asphalt shingles or tar paper) from tearing through. They often have a galvanized or other corrosion-resistant coating to withstand outdoor exposure.
- Drywall Nails: These have a ringed or barbed shank and a concave head. The rings provide exceptional grip in the soft gypsum core of drywall to prevent "popping" (nails working loose), while the concave head allows for easy application of joint compound without leaving a pronounced bump.
- Duplex Nails: Also known as scaffold nails, they feature two heads. The lower head is driven flush with the wood, while the upper head remains proud. This allows for easy disassembly of temporary structures like concrete forms or scaffolding, as the nail can be easily extracted by pulling from the upper head.
The Critical Role of Nail Coatings and Materials
The material and coating of a nail are not mere details; they are primary determinants of its longevity, especially when considering corrosion resistance and holding power. A steel nail used outdoors without protection will rust quickly, staining the wood and losing strength. The choice here directly answers practical concerns like galvanized vs stainless steel nails for outdoor use.
Comparing Corrosion Resistance
For any project exposed to moisture, weather, or humidity, selecting a nail with appropriate corrosion protection is mandatory. The two most common solutions are galvanization and stainless steel, but they are not interchangeable.
Galvanized nails are steel nails coated with a layer of zinc. This zinc coating sacrifices itself (through a process called galvanic corrosion) to protect the underlying steel. There are different types: electroplated (bright, thin coating suitable for indoor use or protected outdoor areas) and hot-dip galvanized (a thicker, rougher coating that provides superior protection for fences, decks, and outdoor structures). Stainless steel nails are made from an alloy that is inherently resistant to rust and corrosion. They are the premium choice for severe environments like coastal areas (salt air), cedar or redwood (which contain natural acids), and permanent outdoor installations.
| Feature | Galvanized Nails (Hot-Dip) | Stainless Steel Nails |
|---|---|---|
| Corrosion Resistance | Very Good for most outdoor applications | Excellent, even in marine/coastal environments |
| Cost | Moderate, cost-effective for most projects | High, a premium product |
| Strength | Standard steel strength | Generally high strength, but can be slightly softer |
| Best For | Decks, fences, pressure-treated lumber, general outdoor use | Cedar/redwood projects, coastal areas, permanent outdoor furniture, critical applications where rust is unacceptable |
For interior projects or those completely protected from moisture, plain steel (often called "bright" finish) nails are perfectly adequate and most economical.
Material and Grip Enhancements
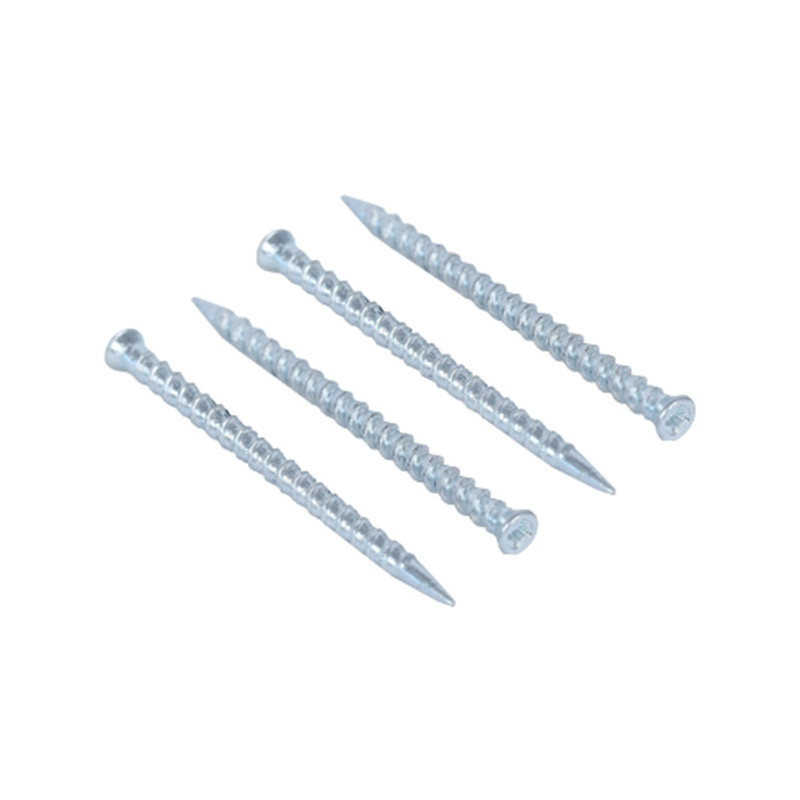
Beyond corrosion, other coatings and shank treatments improve performance. Cement-coated nails have a rough resin or cement layer that melts from the friction of driving, effectively gluing the nail into the wood for increased holding power. Vinyl-coated nails work on a similar principle. Ring shank and screw shank nails have threads or rings cut into their shanks that act like tiny barbs, massively increasing resistance to being pulled out. These are ideal for flooring, decking, and sheathing where withdrawal resistance is critical, a key consideration for ring shank nails for decking safety. Using a smooth shank nail for decking boards is a common error that leads to loose, squeaky, and potentially dangerous decks over time.
Selecting Nails for Common DIY Projects
Let's apply this knowledge to concrete scenarios. Choosing nails becomes straightforward when you match the project's demands with the nail's specifications.
Building a Fence or Deck
Outdoor structures face constant assault from weather, load, and wood movement. For fence rails and posts, or the structural framing of a deck, hot-dip galvanized or stainless steel common nails or, better yet, structural screws are required. For attaching decking boards to joists, the single best choice is ring shank nails for decking safety. The ringed shank prevents the boards from lifting or "popping" up as the wood expands and contracts with seasonal moisture changes. A smooth shank nail will work its way out over time. Furthermore, using the correct galvanized coating prevents unsightly rust streaks down your fence or deck. This project area also highlights the importance of the best nails for concrete block walls DIY query when attaching a wooden fence post to a concrete footing or wall; in that case, a masonry nail might suffice for very light duty, but a proper concrete anchor is usually the correct solution.
Installing Interior Trim and Moldings
This is the domain of the finish nailer and brad nailer. The goal is maximum holding power with minimal visual impact. For thick baseboards and crown molding, 15- or 16-gauge finish nails are ideal. For delicate quarter-round, shoe molding, or attaching thin plywood, 18-gauge brads are perfect. The nails should be long enough to penetrate the underlying wall stud or framing by at least 3/4 of an inch. A frequent challenge here is nailing into hard, old wood or near the end of a trim piece without splitting. This is where a search like how to prevent wood splitting when nailing yields practical techniques: blunting the very tip of the nail (which severs wood fibers rather than wedging them apart), pre-drilling a pilot hole (especially near ends), and using nails with thinner gauges (like brads instead of finish nails).
Assembling Furniture and Crafts
DIY furniture and craft projects often involve joining thinner woods, plywoods, or composites. Here, control, precision, and avoiding splits are key. Brads (18-gauge or smaller) from a pneumatic or electric nailer offer excellent control and minimal marks. For stronger joints in furniture, nails are often used in conjunction with wood glue, providing instant clamping pressure while the glue dries. Understanding nail size chart for woodworking projects is essential here. A general rule is that the nail length should be 2.5 to 3 times the thickness of the piece being attached. For example, to attach a 1/2-inch thick shelf bracket to a 3/4-inch thick plywood side, you'd want a nail about 1 to 1.5 inches long. Using a nail that is too long can protrude dangerously, while one that is too short provides a weak joint.
Pro Tips for Measurement, Selection, and Usage
Mastering a few professional techniques will elevate your DIY results from amateurish to expert level. These tips bridge the gap between theory and practice.
Deciphering Nail Sizes and Charts
Nail sizing can be confusing, using both the "penny" (d) system and inch measurements. The penny system (e.g., 8d, 16d) historically referred to price per hundred and now corresponds to length. An 8d nail is typically 2.5 inches long, a 10d is 3 inches, and a 16d is 3.5 inches. For finer work, nails are measured by gauge (thickness) and length in inches. A higher gauge number means a thinner nail (an 18-gauge brad is much thinner than a 12-gauge nail). Consulting a detailed nail size chart for woodworking projects is invaluable. When in doubt, err on the side of a longer nail for greater holding power, provided it won't protrude through your work. A simple trick for selecting length: hold the nail up to the pieces to be joined; it should be long enough to penetrate the bottom piece by a distance equal to at least two-thirds of its thickness.
Techniques to Avoid Common Problems
Splitting wood is the most frequent frustration. To master how to prevent wood splitting when nailing, implement these strategies:
- Pre-drilling: This is the most reliable method. Drill a pilot hole slightly smaller than the nail's shank diameter, especially when nailing near the end grain of a board or into very hard woods.
- Blunt the Tip: Tap the sharp point of the nail flat with your hammer. This blunt tip pushes through wood fibers rather than separating them, reducing split risk.
- Choose the Right Nail: Opt for a nail with a thinner shank (higher gauge) or a special anti-split shank design.
- Stagger Nails: If driving multiple nails in a line, offset them slightly rather than placing them in a straight grain line.
For driving nails cleanly, use a hammer with an appropriate face size (larger for framing, smaller for finish work) and hold it near the end of the handle for better control and force. For finish nails, use a nail set to drive the head below the surface without damaging the surrounding wood with the hammer.
Making the Final Decision
When standing in the hardware aisle, use this final checklist. First, identify the materials being joined. Second, determine the environmental exposure to choose the coating. Third, calculate the required length and gauge based on thickness and desired hold. Fourth, consider the required appearance to choose between common, finish, or brad heads. Finally, think about the forces involved: for sheer strength (lateral load), a thick common nail is good; for withdrawal resistance (pulling straight out), a ring or screw shank is superior. By systematically working through these parameters—material, environment, size, appearance, and force—you will consistently select the perfect fastener hardware nail for every DIY task, ensuring your projects are built to last.


