 English
 русский
 Español
Content
Getting Started with Furniture Brad Staples
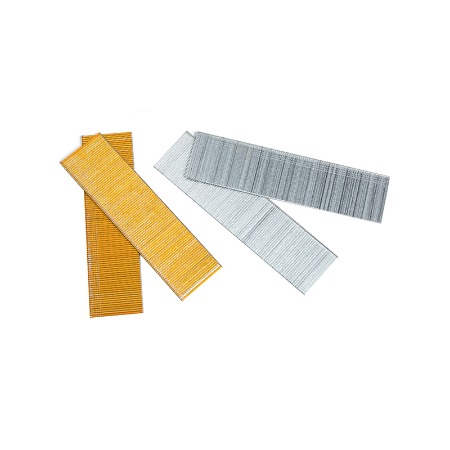
Furniture brad staples are indispensable fasteners in woodworking and upholstery, known for their discreet holding power. These small, thin, T-shaped staples are designed for applications where a clean finish is paramount, such as securing fabric to wood frames, attaching delicate trim, or assembling small wooden projects where nails or screws might be too visible or could split the wood. Their narrow crown and fine gauge allow them to penetrate hardwoods and softwoods with minimal surface disruption, often leaving a hole that is barely noticeable or can be easily concealed with a small amount of wood filler. Understanding the fundamentals of these fasteners is the first step toward leveraging their full potential while maintaining a strict adherence to safety protocols, ensuring that every project is not only professionally finished but also completed without injury.
Understanding the Different Types and Sizes
Selecting the correct type and size of brad staple is a critical decision that directly impacts the integrity and appearance of your work. The most common categorization is by gauge, which refers to the thickness of the staple's wire. A lower gauge number indicates a thicker, stronger staple, while a higher number signifies a thinner, more delicate one. For instance, a 20-gauge brad staple is robust enough for assembling small furniture joints, whereas a finer 22-gauge staple is ideal for attaching lightweight upholstery fabrics or delicate veneers where a larger staple might cause tearing. Furthermore, the crown width—the part of the staple that sits on the material's surface—varies, with narrower crowns being less obtrusive. The leg length must also be chosen carefully; a leg that is too long may protrude through the back of the workpiece, creating a hazard and compromising the structure, while a leg that is too short will not provide sufficient holding power. It is essential to match the staple's specifications to the materials you are joining.
Material Compatibility and Staple Selection
Different materials require different staple characteristics. Using the wrong staple can lead to project failure.
- Hardwoods (e.g., Oak, Maple): Require a sharper, finer gauge staple (like 22-gauge) to prevent splitting. A shorter leg length is often sufficient due to the wood's density.
- Softwoods (e.g., Pine, Cedar): Can accommodate a wider range of gauges, but a 20-gauge staple often provides a good balance of holding power and discretion. Longer leg lengths can be used for deeper penetration.
- Plywood and MDF: These engineered woods have varying densities. A medium-gauge staple (20 or 21-gauge) is typically safe. Care must be taken with MDF's edges, as they are prone to blowing out.
- Upholstery Fabric: A fine 22-gauge staple with a narrow crown is almost always the best choice to avoid damaging the textile and to remain invisible.
Choosing the Right Tools for the Job
The efficiency and safety of working with furniture brad staples are heavily dependent on using the appropriate tool: a pneumatic or electric brad stapler. Pneumatic staplers, powered by an air compressor, are favored by professionals for their consistent power, rapid firing rate, and durability. They are excellent for large projects like building multiple pieces of furniture or extensive re-upholstery work. In contrast, electric staplers, either corded or cordless, offer greater portability and convenience for the hobbyist or for smaller, less frequent tasks, though they may lack the raw power and speed of their pneumatic counterparts. The choice between them hinges on the scale of your projects, your available budget, and your need for mobility. Regardless of the type, ensuring the tool is compatible with the specific gauge and length of brad staples you plan to use is non-negotiable; using incorrect staples can jam the tool and pose a significant safety risk.
Pneumatic vs. Electric Brad Staplers: A Detailed Comparison
To make an informed decision, it is helpful to directly compare the two main types of brad staplers. The following table outlines the key differences to consider before making a purchase.
The primary distinctions can be summarized as follows: Pneumatic staplers generally offer more power and a faster firing rate, making them suitable for heavy-duty, continuous use. Electric staplers provide greater convenience and portability, ideal for quick fixes and projects away from a workshop.
| Feature | Pneumatic Brad Stapler | Electric Brad Stapler |
|---|---|---|
| Power Source | Air Compressor | Electrical Outlet or Battery |
| Best For | High-volume projects, professional workshops | Hobbyists, small projects, locations without air supply |
| Power & Consistency | High, consistent power output | Moderate power, can vary as battery depletes |
| Portability | Lower (requires hose and compressor) | Higher, especially cordless models |
| Noise Level | Loud (compressor and tool noise) | Generally quieter |
| Initial Cost | Often lower (tool only), but requires compressor | Higher for the tool itself |
| Maintenance | Requires regular oiling and moisture removal from air lines | Minimal, primarily battery care and cleaning |
Mastering Safe Handling and Operation
Operating a brad stapler demands respect for the tool's inherent power and potential danger. The fundamental rule of any power tool applies: always read and understand the manufacturer's operating manual thoroughly before first use. A cornerstone of safe operation is wearing appropriate personal protective equipment (PPE). Safety glasses are absolutely mandatory to protect your eyes from a staple that might ricochet or a piece of fragmented material. Furthermore, the tool is capable of driving a staple with significant force, and you should never point it at any part of your body or another person, even if you believe it is unloaded or disconnected. Always keep your free hand well away from the firing path. Before making any adjustments, clearing a jam, or performing maintenance, disconnect the tool from its power source—whether that means disconnecting the air hose or removing the battery. Developing these safe habits is not optional; it is essential for preventing serious accidents. A common query among users is how to prevent brad staples from splitting wood, which is often addressed by selecting the correct staple size and using proper technique, a topic we will delve into later.
Essential Personal Protective Equipment (PPE)
Never operate a brad stapler without the following protective gear:
- Safety Glasses or Goggles: These are the most critical item. They must provide side protection to guard against lateral projectiles.
- Hearing Protection: Especially when using a pneumatic stapler with a loud compressor, hearing protection like earmuffs or earplugs is recommended to prevent long-term hearing damage.
- Dust Mask or Respirator: When sanding wood or working in a dusty environment, a mask protects your lungs from fine particulate matter.
- Fitted Work Gloves: While you should never place your hand in the line of fire, gloves can protect your hands from sharp edges, splinters, and the heat generated by a motorized tool.
Advanced Techniques for Flawless Results
Moving beyond basic operation, several advanced techniques can elevate the quality of your work from amateur to professional. One of the most sought-after skills is knowing the best way to countersink brad staples for a clean finish. Countersinking involves driving the staple just below the surface of the wood, allowing the hole to be filled and sanded flush, rendering the fastener invisible. Many modern brad staplers come with a depth-of-drive adjustment dial. By experimenting on scrap wood, you can find the perfect setting that sinks the staple crown to the ideal depth without driving it too deep and compromising its holding power. For staplers without this feature, you can adjust the air pressure on a pneumatic model. Once countersunk, a small amount of colored wood filler or a dab of glue mixed with sanding dust can be used to conceal the staple completely. Another crucial technique for complex assemblies is understanding the proper angle for driving brad staples in corners. Angling staples towards each other in a "V" pattern creates a mechanical lock that significantly increases the joint's strength, far more than staples driven straight in. This is particularly useful for reinforcing mitered joints and assembling cabinet frames.
Step-by-Step Guide to Reinforcing Mitered Joints
Mitered joints are beautiful but notoriously weak. Brad staples can provide excellent reinforcement when applied correctly.
- Preparation: Ensure the mitered surfaces are cut perfectly at 45-degree angles and are clean and flat. Apply a high-quality wood glue to both surfaces and clamp the joint together firmly, wiping away any excess glue that squeezes out.
- Staple Placement and Angling: Once the glue has set slightly (but is not fully cured), plan your staple placement. You will drive staples from both sides of the joint. Angle your brad stapler at approximately 45 to 60 degrees towards the center of the joint.
- Driving the Staples: Fire one or two staples from one side, ensuring they penetrate both pieces of wood. Then, repeat the process from the opposite side, with the staples angled to intersect with the first set inside the wood. This creates a cross-hatched pattern that locks the joint together.
- Finishing: Countersink the staples if necessary, fill the holes, and sand the entire area smooth once the glue has fully cured. This technique provides a strong, nearly invisible reinforcement.
Troubleshooting Common Issues
Even with the best preparation, you may encounter issues during your work. Knowing how to diagnose and resolve these problems quickly is a mark of an experienced craftsperson. One of the most frequent frustrations is a staple jam. If your tool jams, immediately disconnect it from the power source. Refer to your manual for the specific jam-clearing procedure, which usually involves opening a latch and carefully removing the misfired staple or fragments with needle-nose pliers. Never try to force a jammed tool to fire, as this can cause permanent damage. Another common problem is staples not sinking to the desired depth. This can be caused by insufficient air pressure, a dull driver blade, or using staples that are too long or thick for the material. Conversely, staples driven too deep can lose their holding power. This is often a result of excessive air pressure or an incorrect depth setting. A question we often encounter is about troubleshooting a brad stapler that won't fire consistently. This can often be traced back to a weak power source (a low battery or an underpowered compressor), a dirty or worn O-ring in a pneumatic tool, or a malfunctioning trigger mechanism. For many users, understanding how to choose brad staple length for different wood thicknesses is the key to avoiding these issues altogether. A good rule of thumb is that the staple leg length should be about two-thirds the thickness of the top material you are driving into, ensuring a secure hold without protrusion.
Diagnosing Depth-Related Problems
Here is a quick guide to diagnosing why your staples are not sinking to the correct depth.
- Staple Sits Proud of the Surface:
- Cause: Insufficient air pressure, dull driver blade, or a clogged exhaust vent.
- Solution: Increase air pressure slightly (for pneumatic tools), sharpen or replace the driver blade, and clean the tool's exhaust.
- Staple Driven Too Deep:
- Cause: Excessive air pressure or depth-of-drive setting is too aggressive.
- Solution: Reduce air pressure or adjust the depth control to a shallower setting. Test on scrap wood first.
- Staple Bends or Fails to Penetrate:
- Cause: Staple gauge is too fine for the material, hitting a knot or very dense grain, or the tool is not being held firmly against the workpiece.
- Solution: Use a heavier-gauge staple, pre-drill a pilot hole in hardwoods, or ensure you are applying firm, even pressure when firing.
Maintaining Your Equipment for Longevity
Regular maintenance is the key to ensuring your brad stapler remains a reliable and safe partner in your workshop for years to come. A well-maintained tool not only performs better but also reduces the likelihood of jams and misfires. For pneumatic staplers, this means adding a few drops of specialized pneumatic tool oil into the air inlet before each use or as recommended by the manufacturer. This oils the internal hammer and O-rings, preventing wear and ensuring a smooth, powerful action. It is also crucial to use an in-line air filter and moisture trap on your compressor to prevent water and debris from entering and corroding the tool's internal components. After each use, drain the moisture from your air compressor's tank. For electric staplers, maintenance is simpler but still important. Keep the exterior clean and free of dust and debris, and periodically check the battery contacts for corrosion. For all types, store the tool in a dry, clean place, and if it will not be used for an extended period, empty it of staples. A clean, lubricated tool is a safe and efficient tool.
Weekly and Monthly Maintenance Checklist
Adhering to a simple maintenance schedule can prevent most common problems.
- After Every Use:
- Disconnect the tool from its power source.
- Wipe down the exterior with a clean, dry cloth.
- Check for any visible damage to the nose or magazine.
- Weekly (or after heavy use):
- Use compressed air to blow out dust and debris from the magazine and driver channel.
- For pneumatic tools, oil the air inlet if not done daily.
- Inspect the O-rings for signs of wear or damage (pneumatic tools).
- Monthly:
- Lubricate any moving parts as specified in the manual (e.g., the pivot point of the handle).
- Check and tighten any loose screws or fasteners.
- Perform a full functional test on a piece of scrap material.


