 English
 русский
 Español
Content
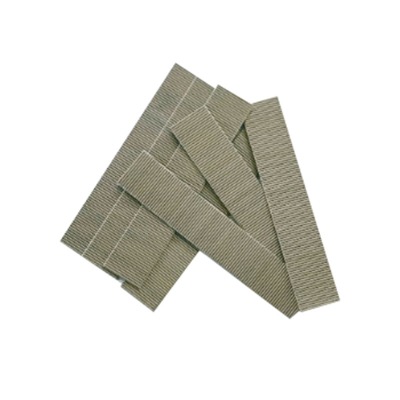
Understanding the Fundamentals of Nail Fasteners
Fastener hardware nails are among the most fundamental and ubiquitous components in construction, woodworking, and countless DIY projects. Despite their simplicity, the choice of nail can profoundly impact the strength, durability, and finish of any undertaking. This guide delves deep into the world of nails, moving beyond the basics to explore specialized types and their optimal applications, ensuring your next project is built on a solid foundation.
Anatomy of a Nail
To make an informed decision, one must first understand the components of a nail. Each part is engineered for a specific purpose.
Key Components
- Head: The top part of the nail, which is struck by the hammer. Head designs vary widely; flat heads provide a larger striking surface and hold materials tightly, while finishing nails have smaller, cupped heads that can be driven below the material surface.
- Shank: The body of the nail that determines its holding power. A smooth shank is easier to drive but offers less resistance to pulling out. A ring or screw shank provides dramatically increased holding power by biting into the surrounding wood fibers.
- Point: The tip that penetrates the material. Diamond points are the most common, offering a good balance of ease of driving and reduced wood splitting. Needle points are sharper and are excellent for hardwoods and minimizing splitting.
- Finish: The coating or plating on the nail. This can be for corrosion resistance (e.g., galvanization), aesthetic purposes (e.g., brass), or to enhance driving (e.g., vinyl or cement coatings that act as a lubricant when driven and then harden to improve grip).
The Critical Role of Nail Gauges and Sizes
Selecting the correct size is not a matter of guesswork. Using a nail that is too short can result in a weak joint, while one that is too long can split the wood or protrude dangerously. Nails are measured in pennies, denoted by the abbreviation "d." This historical measurement refers to the nail's length. The gauge number refers to the shank's diameter; a lower gauge number indicates a thicker nail.
best galvanized nails for outdoor fencing
When constructing an outdoor fence, the fastener choice is not merely about holding the structure together; it's about ensuring it withstands years of exposure to sun, rain, snow, and humidity. This is where best galvanized nails for outdoor fencing become non-negotiable. Galvanization is the process of applying a protective zinc coating to steel or iron to prevent rusting.
Why Galvanized Nails are Essential for Fencing
Untreated steel nails will rust and corrode when exposed to moisture. This corrosion weakens the nail, leading to joint failure, and can cause unsightly reddish-brown stains (iron oxide) to bleed down your fence boards. Galvanized nails form a barrier that sacrificially protects the underlying steel, drastically extending the life of your fence.
Types of Galvanization for Fence Nails
Not all galvanized nails are created equal. The method of galvanization determines the level of protection.
Electro-Galvanized (EG)
This process involves electroplating a thin layer of zinc onto the nail. It provides a smooth, clean finish but offers only a basic level of corrosion resistance. EG nails are suitable for indoor use or outdoor projects in very dry climates but are generally not recommended for long-term outdoor fencing where they are consistently exposed to moisture.
Hot-Dip Galvanized (HDG)
This is the gold standard for outdoor and marine applications. Nails are dipped in a molten bath of zinc, resulting in a much thicker, rugged, and uneven coating. This coating provides superior protection against rust and is highly recommended for all outdoor fencing projects, particularly those in damp climates or using pressure-treated lumber, which contains corrosive chemicals.
Choosing the Right Nail Type and Size
For fencing, ring shank or screw shank nails are ideal as their design provides exceptional withdrawal resistance, preventing boards from loosening over time. A common size for attaching pickets to rails is 6d or 8d ringshank, hot-dip galvanized nails. For structural posts and heavier framing, larger 16d or 20d HDG common nails are appropriate.
comparing finishing nails vs brad nails
In the realm of trim work, cabinetry, and fine woodworking, the finish is paramount. Two types of nails dominate this space: finishing nails and brad nails. While often used interchangeably by novices, understanding the distinction is key to a professional-looking result. comparing finishing nails vs brad nails reveals important differences in their application.
Defining Finishing Nails
Finishing nails are typically 16-gauge or 15-gauge wires. They are stronger and thicker than brad nails, designed to hold heavier moldings like baseboards, crown molding, and door casings securely in place. Their slightly larger size provides the necessary holding power for these substantial pieces without splitting the wood. They have a small, cupped head that allows them to be driven slightly below the wood surface (set) with a nail setter and then concealed with wood filler.
Defining Brad Nails
Brad nails are lighter and thinner, usually 18-gauge. Their primary advantage is their minimal tendency to split delicate wood and their extremely small head, which leaves a nearly invisible hole. Brad nails are the go-to choice for attaching thin, delicate trim, securing small pieces of decorative molding, attaching paneling, and any application where the holding power of a finishing nail is excessive and could risk damaging the workpiece.
Key Comparison Table
The following table provides a clear, side-by-side comparison of finishing nails and brad nails to help you select the right fastener for your project.
| Feature | Finishing Nails | Brad Nails |
|---|---|---|
| Gauge (Thickness) | 15-Gauge or 16-Gauge (Thicker) | 18-Gauge (Thinner) |
| Holding Power | High - for heavier moldings | Low to Medium - for delicate trim |
| Head Size | Small, can be set and filled | Very small, minimally invasive |
| Primary Use | Baseboards, crown molding, door/window casings | Thin trim, shoe molding, securing paneling, crafts |
| Risk of Splitting Wood | Moderate | Very Low |
strongest nails for hardwood applications
Working with hardwood presents a unique set of challenges. Its density and interlocking grain structure make it prone to splitting, and its weight demands fasteners with superior holding power. Selecting the strongest nails for hardwood applications requires careful consideration of material, design, and technique.
Challenges of Fastening Hardwood
Driving a standard nail into oak, maple, or hickory is difficult and often results in a bent nail or a split board. The wood's density offers immense resistance, and its lack of elasticity means it cannot easily compress to allow the nail to pass through without fracturing.
Nail Types Engineered for Hardwood
Several nail types are specifically designed to overcome these challenges:
Blued or Cement-Coated Hardwood Nails
These nails feature a specialized finish that reduces friction during driving. The coating acts as a lubricant, allowing the nail to penetrate the dense wood more easily and with less chance of bending. Once installed, the coating cures, enhancing grip and holding power.
Ring Shank or Screw Shank Nails
This is arguably the best choice for hardwood. The threaded shank does not just push fibers aside; it cuts through them and creates a mechanical lock. The withdrawal resistance of a ring shank nail in hardwood is exponentially higher than that of a smooth shank nail, creating an incredibly strong joint.
Square or Grooved Boat Nails
For the most demanding applications, these nails are designed to grip with exceptional force. Their shape makes them highly resistant to turning and pulling out, making them a premium choice for high-stress hardwood joints.
Best Practices for Nailing Hardwood
- Pilot Holes: Always drill a pilot hole slightly smaller than the nail's shank diameter. This is the single most effective way to prevent splitting in hardwood.
- Nail Orientation: Avoid nailing too close to the end or edge of a board. If you must, a pilot hole is essential.
- Tool Choice: Use a hammer with adequate mass or a pneumatic nailer with sufficient pressure. A weak strike will not cleanly drive the nail and increases the chance of bending it.
affordable bulk nails for construction projects
For large-scale construction projects like framing a house, building a deck, or erecting a shed, the cost of fasteners can add up significantly. Sourcing affordable bulk nails for construction projects is a key concern for contractors and serious DIYers alike, but affordability should not come at the expense of quality and performance.
What Defines "Bulk" and Where to Find Value
Bulk purchasing typically means buying nails in large quantities, often 50-pound boxes, instead of small 1-pound boxes. This dramatically reduces the cost per nail. The value is found not in opting for the cheapest, lowest-quality product, but in finding a competitively priced nail that meets the specific mechanical and corrosion-resistant requirements of the project.
Prioritizing Project Requirements Over Pure Cost
The "best" bulk nail is the one that is fit for purpose. Using incorrect or substandard nails can lead to catastrophic failure, callbacks, and expensive repairs.
Framing Nails
For structural framing, 8d, 10d, and 16d common nails are the standard. For bulk purchases, look for:
- Material: Hardened steel for durability.
- Coating: Vinyl or cement coatings are common for bulk framing nails. They lubricate the nail for easier driving and improve holding power. For exterior walls or plates on concrete, hot-dip galvanized nails are necessary to prevent rust.
- Shank: Smooth shank is standard, but ring shank nails offer vastly superior holding power for shear walls and are often required by building codes in high-wind or seismic zones.
Calculating Quantity and Avoiding Waste
Accurate estimation is crucial to avoid overbuying or costly mid-project delays. Standard estimates exist for framing (e.g., approximately 0.3 pounds of nails per square foot of floor area), but these should be adjusted for the specific project. Proper storage of bulk nails is also critical; they should be kept in a dry environment to prevent rust, which can render them useless.
specialty nails for roofing installations
A roof is a building's first line of defense against the elements, and its integrity depends entirely on the quality of its installation, right down to the fasteners. Using the wrong nail can lead to leaks, wind uplift damage, and premature roof failure. specialty nails for roofing installations are engineered to provide a secure, long-lasting, and weatherproof hold.
The Anatomy of a Roofing Nail
Roofing nails are instantly recognizable by their wide, flat heads and short, thick shanks.
The Large Head
The oversized head is designed to securely hold roofing felt, asphalt shingles, or cedar shakes without tearing through the material. It provides a large surface area to create a weather-tight seal against the roof surface.
The Short, Thick Shank
Roofing nails are designed to penetrate only through the roof sheathing (usually OSB or plywood) and not protrude into the attic space. Their thickness prevents them from bending when driven through tough materials like asphalt shingles.
Material and Coating: Resistance is Key
Roofing nails are constantly exposed to sun and water, making material choice critical.
Hot-Dip Galvanized Steel
This is the minimum standard for roofing nails. The thick zinc coating provides excellent rust resistance, ensuring the nail head does not corrode and compromise the seal over time.
Stainless Steel
For the ultimate in corrosion resistance, especially in coastal areas with salt spray or for long-lasting roofs like those made with slate or copper, stainless steel roofing nails are the best choice. They will not rust, guaranteeing the longevity of the roof's attachment.
Selecting the Correct Nail Length
Nail length is governed by a simple rule: it must be long enough to penetrate completely through the roofing material and into the roof sheathing by at least 3/4 of an inch. For example, when installing thick asphalt shingles over plywood sheathing, a 1-1/4 inch nail is standard. For thicker materials like cedar shakes or when nailing over existing layers, a longer nail, such as 1-1/2 or 1-3/4 inches, is required.


")


