 English
 русский
 Español
Content
- 1 Understanding Furniture Brad Staples and Their Role in Woodworking
- 2 Selecting the Right Brad Staples for Your Project
- 3 Essential Safety Protocols for Brad Nailer Staplers
- 4 Mastering Efficient Techniques for Strong Joints
- 5 Troubleshooting Common Brad Staple Issues
- 6
- 7 Advanced Applications and Creative Uses
Understanding Furniture Brad Staples and Their Role in Woodworking
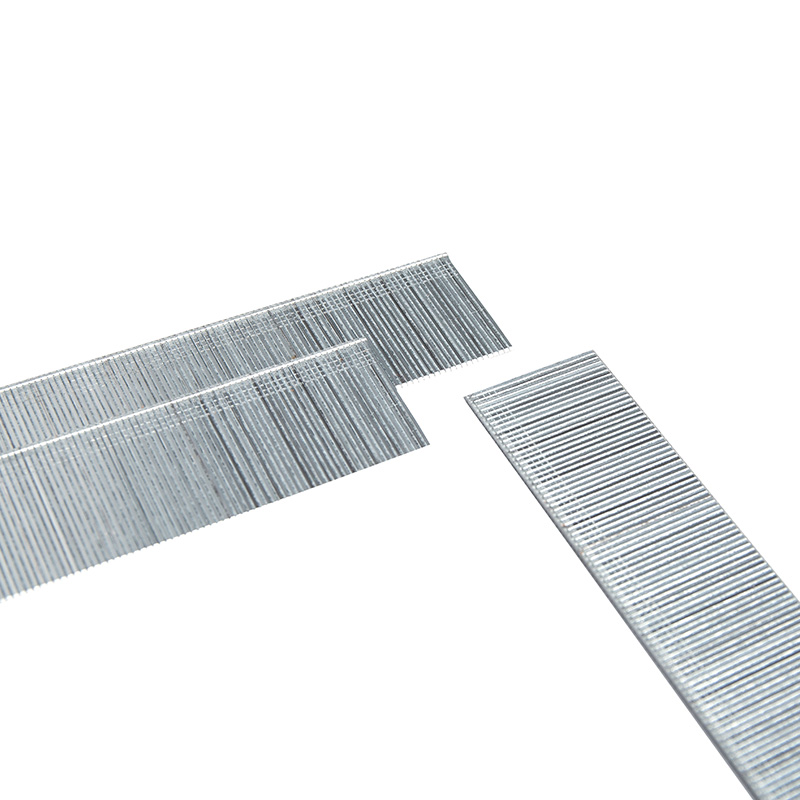
Furniture brad staples are compact fasteners designed for clean and strong joinery in woodworking, especially in furniture, cabinetry, and trim work. They combine the holding strength of a staple with the small profile of a brad nail, making them suitable for work where visible fastener heads are not desired. Compared with larger nails or staples, brad staples have a narrow crown and fine legs, which reduce the risk of splitting thin woods while still providing good holding force. Knowing how to use these fasteners safely and correctly helps woodworkers achieve a durable and professional finish. This guide explains how to choose, handle, and apply furniture brad staples with care and precision.
Selecting the Right Brad Staples for Your Project
Choosing the proper brad staple directly affects the joint’s appearance and durability. The decision should be based on material type, size, and working conditions to make sure the fastener performs properly without harming the wood.
Key Factors in Staple Selection
When selecting from different fastener types, consider these main elements to make an informed choice.
Material and Finish
The staple’s material determines its strength and resistance to corrosion. Common options include steel, stainless steel, and galvanized steel. For indoor furniture projects, plain steel staples are often enough and cost-efficient. For work in humid or outdoor settings, stainless or galvanized versions prevent rust and surface stains. Matching the staple’s finish with the environment helps ensure long-term stability.
Staple Size and Gauge
Staple size is equally important. The leg length should be chosen according to the wood’s thickness. A simple rule: the staple should enter the base wood by about three-quarters of an inch. Too long may pierce through; too short will not hold well. The gauge, or wire thickness, also matters. A thinner gauge (higher number) suits delicate trim, while thicker wire (lower number) provides more strength for heavier structures. Understanding these dimensions is part of using a brad staple size chart effectively for different woods.
Brad Staple Size Guide for Common Wood Types
The proper size changes depending on the wood type. The table below offers general guidance.
| Wood Type | Recommended Leg Length | Recommended Gauge | Typical Application |
|---|---|---|---|
| Softwoods (Pine, Cedar) | 1 inch to 1.5 inches | 18 Ga | Framing, basic furniture construction |
| Hardwoods (Oak, Maple) | 3/4 inch to 1 inch | 16 Ga or 18 Ga | Cabinet assembly, hardwood joinery |
| Delicate Trim & Veneers | 1/2 inch to 3/4 inch | 20 Ga or 22 Ga | Thin moldings, veneer work |
Softwoods usually allow longer and slightly thicker staples due to their softer grain. Hardwoods, being dense, need shorter staples to avoid cracking. For fine trim or veneers, use the thinnest and shortest staples to prevent visible marks or splits. Following these basics helps when learning how to choose brad staples for furniture that balance strength and appearance.
Essential Safety Protocols for Brad Nailer Staplers
Using a brad nailer stapler requires attention and care. These tools are efficient but can be dangerous if mishandled. Following safety rules protects both the operator and the workpiece.
Personal Protective Equipment (PPE)
Before turning on the tool, put on proper safety gear. It is your first line of defense against accidents.
- Safety Glasses: Always wear impact-resistant glasses to prevent eye injuries from flying fragments or misfires.
- Hearing Protection: Pneumatic staplers are loud. Use earplugs or earmuffs to reduce long-term hearing risk.
- Dust Mask/Respirator: Woodworking produces fine dust. Use a mask, especially when cutting or sanding, to avoid breathing in harmful particles.
Safe Tool Operation and Workspace Management
Handling the tool correctly and keeping a clean workspace are key for safe operation. Below are some useful safety tips for brad nailer staplers.
- Treat the tool as if loaded at all times. Never point it toward yourself or anyone else.
- Keep your non-working hand away from the firing area to avoid accidental stapling.
- Disconnect power or air supply before clearing jams or during maintenance.
- Secure your workpiece with clamps to prevent slipping and misfires.
- Work in a bright, uncluttered area to stay alert and precise.
Following these habits makes your workspace safer and helps you focus on quality joinery.
Mastering Efficient Techniques for Strong Joints
Efficient stapling is about strength and precision, not just speed. Proper technique results in clean, hidden fastenings that keep joints tight and stable.
Angling and Placement Strategies
Driving staples straight in is not always ideal. Angled fastening can increase joint grip.
- Toe-Nailing (Angled Fastening): Drive staples at an angle through one piece into another. It works well for corners and T-joints, resisting pulling forces.
- Gluing and Fastening: Apply wood glue before stapling. The staples act like clamps while the glue cures, producing a strong bond.
- Staggered Placement: Avoid lining up staples in a straight row. Stagger them slightly to spread stress evenly along the grain and reduce splitting.
Minimizing Surface Damage and Achieving a Clean Finish
A neat surface finish requires control and understanding of how wood reacts to pressure.
- Set your stapler to the lowest pressure that still drives staples flush. Excess force can leave deep marks.
- Use a small pilot mark or awl to guide staples and prevent splintering.
- Fill small indentations with color-matched wood putty. For clear-coated work, a mix of sanding dust and glue creates a nearly invisible repair.
These methods reflect the practical techniques for brad staples in wood joinery that help achieve solid and clean results.
Troubleshooting Common Brad Staple Issues
Even careful work can run into problems. Knowing how to spot and fix them quickly keeps projects on track.
Identifying and Resolving Frequent Problems
Below are typical issues with furniture brad staples and how to handle them.
Jamming and Misfires
Jams often result from low-quality staples, incorrect loading, or a dirty tool.
- Solution: Disconnect the power source first. Follow your manual to open the magazine and remove the jammed staple. Keep the tool clean and lightly lubricated to avoid buildup that causes jams.
Splitting Wood and Weak Joints
Splitting or weak joints usually relate to the wrong staple size or technique.
- Fix for Splitting: Use a finer gauge staple and avoid fastening near the end grain. For very hard woods, pre-drilling can prevent splits.
- Fix for Weak Joints: Use longer staples for deeper grip and add wood glue for extra bonding strength. Review the joint design if needed.
Comparison of Common Staple Issues and Solutions
| Problem | Likely Cause | Recommended Solution |
|---|---|---|
| Staple not flush | Low air pressure; worn driver blade; staple too long | Increase pressure slightly; service the tool; switch to a shorter staple. |
| Staple too deep | High air pressure; soft wood | Reduce air pressure; use a wider crown staple. |
| Frequent jams | Damaged staples; dirty magazine; wrong loading | Use quality staples; clean the tool; reload correctly. |
By identifying these problems early and applying simple fixes, you can maintain consistent performance and avoid wasted materials.
Advanced Applications and Creative Uses
Once you are familiar with the basics, furniture brad staples can be used in many creative ways to solve special joinery or decorative needs. Exploring these practical uses for brad staples adds flexibility to your woodworking.
Beyond Basic Joinery
Because they are small and discreet, brad staples work well in areas where other fasteners might stand out or damage the surface.
- Upholstery Work: Common for securing fabric to furniture frames. The fine legs grip the wood firmly without splitting and remain unseen under fabric.
- Decorative Inlays: Use them to hold thin inlay pieces while glue sets, leaving minimal marks after removal.
- Jig and Fixture Building: Handy for temporary workshop assemblies or fixtures that may be disassembled later.
- Back Panels: Ideal for fixing the back panels of cabinets or shelves—fast, clean, and secure without overcomplicating assembly.
With thoughtful application, brad staples support both practical and creative woodworking, combining function with subtle craftsmanship.


